
Installing GLUT
If you don't have it already, you will need to install GLUT before you can follow the rest of the directions.
Download the GLUT libraries and header files here. There's no installer, so you will have to put the files manually in places where the compiler will find them. Assuming Developer Studio is in the standard places, put:
glut.h in C:\Program Files\Microsoft Visual Studio\VC98\include\
glut32.lib in c:\Program Files\Microsoft Visual Studio\VC98\lib
glut32.dll in c:\windows\system32 (or c:\WINNT\system32, if you're running Windows NT/2000)
You should only have to do this once.
Writing an OpenGL program on Windows
This document will guide you through the steps needed to write an application that uses OpenGL on the Windows platform. We assume you're using Microsoft Visual Studio 6.0. If you're not, you should be able to adapt these instructions to suit your development environment.
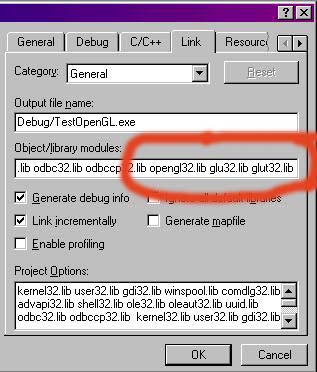
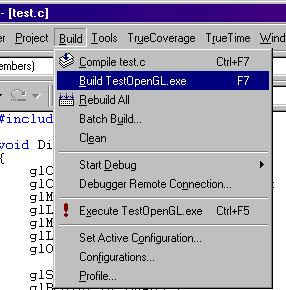
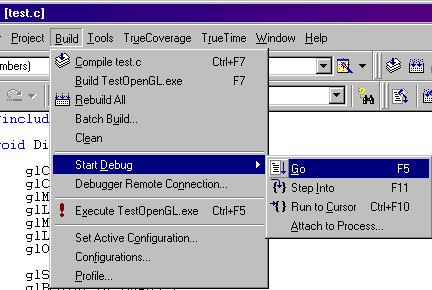
Your project is now ready to use OpenGL, the GLU library, and the GLUT library. To test your setup, try the following:
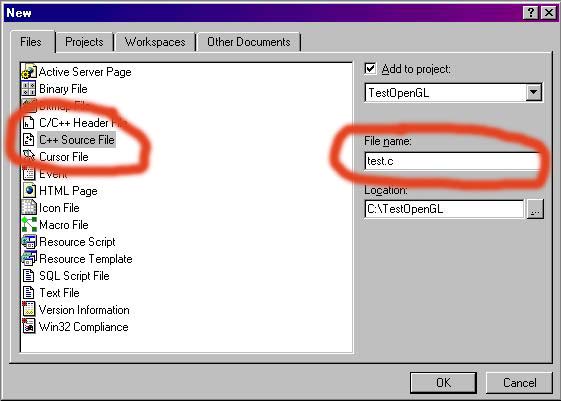
Type in the following code:

#include <glut.h>

void Display( void )
{
	glClearColor( 0, 0, 0, 1 );
	glClear( GL_COLOR_BUFFER_BIT );
	glMatrixMode( GL_PROJECTION );
	glLoadIdentity();
	glMatrixMode( GL_MODELVIEW );
	glLoadIdentity();
	glOrtho( 0, 1, 0, 1, -1, 1 );

	glShadeModel( GL_SMOOTH );
	glBegin( GL_QUADS );
		glColor3f( 1, 0, 0 );
		glVertex3f( 0, 0, 0 );
		glColor3f( 0, 1, 0 );
		glVertex3f( 0, 1, 0 );
		glColor3f( 0, 0, 1 );
		glVertex3f( 1, 1, 1 );
		glColor3f( 1, 1, 1 );
		glVertex3f( 1, 0, 0 );
	glEnd();
	glFlush();
}

int main( int argc, char *argv[] )
{
	glutInit( &argc, argv );
	glutInitWindowSize( 300, 300 );
	glutInitDisplayMode( GLUT_SINGLE | GLUT_RGBA );

	glutCreateWindow( "Testing OpenGL!" );
	glutDisplayFunc( Display );

	glutMainLoop();
	return 0;
}
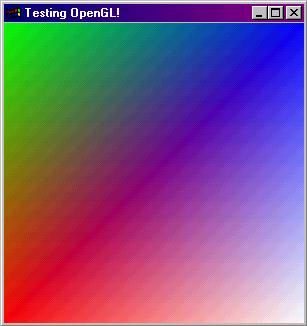
You should see a window that looks like the following (minus the horrible JPEG artifacts):